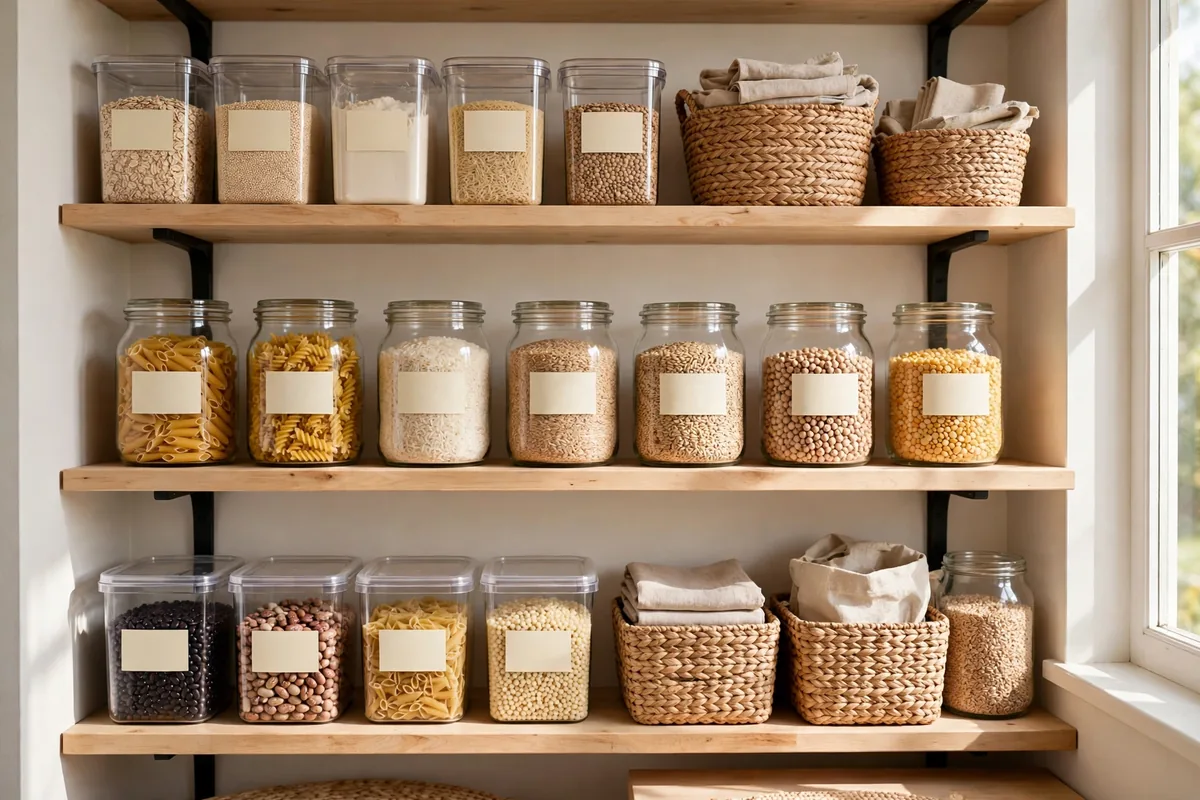
A messy pantry is rarely a space problem. It is a system problem. When everything lands wherever it fits, the same staples get bought twice, half-used bags slump behind the cans, and food quietly expires at the back of the deepest shelf. More containers alone do not fix that — they just organize the chaos into prettier boxes.
What fixes it is giving every category a fixed home and placing those homes according to how often you reach for them. That is the idea behind pantry zones: divide the pantry into zones by category and frequency, put everyday items where your hand naturally falls, and keep backstock out of prime space. This guide lays out one specific, workable version of that system — five zones — and then maps it onto the three pantries people actually have: a small pantry, a closet or cabinet pantry, and a walk-in. You will also find a zone map you can copy, a budget path that starts with what you already own, and the short restock routine that keeps the system working after the first tidy weekend.
Before You Organize: Empty, Sort, Measure
Every pantry reset starts the same unglamorous way, and skipping any part of it is why so many reorganizations fail within a month. Containers bought before sorting just move the mess around; zones assigned before measuring end up the wrong size.
The sort: keep, use soon, or let go
Take everything out — all of it, shelf by shelf. As each item comes out, check it: past its date, stale, damaged packaging, or an ingredient for a recipe nobody in the house will ever make? Those go. What remains sorts into three honest piles:
- Keep — staples you use regularly and will restock.
- Use soon — open, near-date, or one-off items that need a plan in the next few weeks. These earn a visible spot, not a burial at the back.
- Discard or donate — expired or damaged goods go out; sealed, in-date items you will never use can be donated instead of stored forever.
Then wipe the shelves. Starting from an empty, clean pantry is what makes the zone layout below a deliberate decision instead of a shuffle.
Measure before you buy anything
Measure before a single container enters your cart: the width and depth of each shelf, the vertical clearance between shelves, and — for closet pantries — how far the door swings and whether it clears bins on the floor. Write the numbers down and keep them in your phone. Shelf depth matters most: on deep shelves, anything behind the front row effectively disappears, which is why this system treats depth as a design problem (pull-out bins, one-row-deep rules) rather than a storage bonus. Most “the container didn’t fit” returns and half-used organizer sets trace back to this five-minute step being skipped.
The 5-Zone Pantry System
The system is simple to state: five zones, each a category of food with its own home, arranged by how often you use them. Frequency decides height — the things you reach for daily sit between waist and eye level, heavy items go low where lifting is safe, and light, rarely used items go high. One category gets one home, so anyone in the household can find and return things without thinking.
Zone 1: Everyday Cooking
The workhorse zone: cooking oils and vinegar, pasta, rice and grains you cook from daily, canned tomatoes and beans, stock, and the spices that go into weeknight food. This zone gets the prime real estate — the shelf or shelves at waist-to-eye level, closest to where you prep. If you cook most nights, this is the zone you will touch every single day, and it should be the easiest reach in the whole pantry.
Zone 2: Breakfast
Cereal, oats, coffee and tea, spreads, honey, and anything else that starts the day. Grouping breakfast together means one grab in the morning instead of a tour of the whole pantry. In a shared household this zone works best on a shelf everyone can reach, and in a small pantry it often shares a shelf with part of Zone 1 — that is fine; zones can split across a shelf line as long as each category keeps one clear home.
Zone 3: Baking
Flours, sugars, baking powder and soda, cocoa, extracts, chocolate chips, and other mix-ins. Baking ingredients are used in bursts rather than daily, so this zone can sit a step less prime — one shelf up or down from Zone 1. This is the zone that benefits most from decanting (covered below), because flours and sugars are scooped, spill-prone, and hard to judge at a glance in their original bags.
Zone 4: Snacks
Chips, crackers, bars, nuts, dried fruit — the high-traffic, high-chaos category. Snacks earn their own zone precisely because they otherwise colonize every shelf. A single bin or shelf contains them, and in households with children, placing this zone at child height is a deliberate choice: kids can help themselves without climbing or rummaging through the cooking staples. Keep the zone bounded — when the snack bin is full, that is the inventory.
Zone 5: Backstock and Bulk
Unopened duplicates, bulk buys, paper goods overflow, and the second bag of rice. Backstock is essential to the system — it is what makes restocking instant — but it must never occupy prime space. It goes high (light items), low (heavy items), or deepest, and each in-use item has its backup directly behind it or in one known backstock spot. The moment backstock creeps onto the everyday shelves, the zones start dissolving.
The placement rules that make zones work
Zones fail when they are just labels. These rules are what keep them functioning:
- Frequency decides height. Daily items between waist and eye level; weekly items a shelf up or down; rare items highest or lowest.
- Heavy goes low. Bulk liquids, big bags, and cases sit low — safer to lift, and they cannot fall far.
- Light goes high. Chips, cereal overstock, and paper goods weigh little and are grabbed rarely.
- One category, one home. If pasta lives in two places, it will eventually be bought three times.
- Leave room to grow. A shelf packed to 100% cannot absorb a grocery run. Aim for roughly a hand’s width of slack in active zones.
Reading the zone map
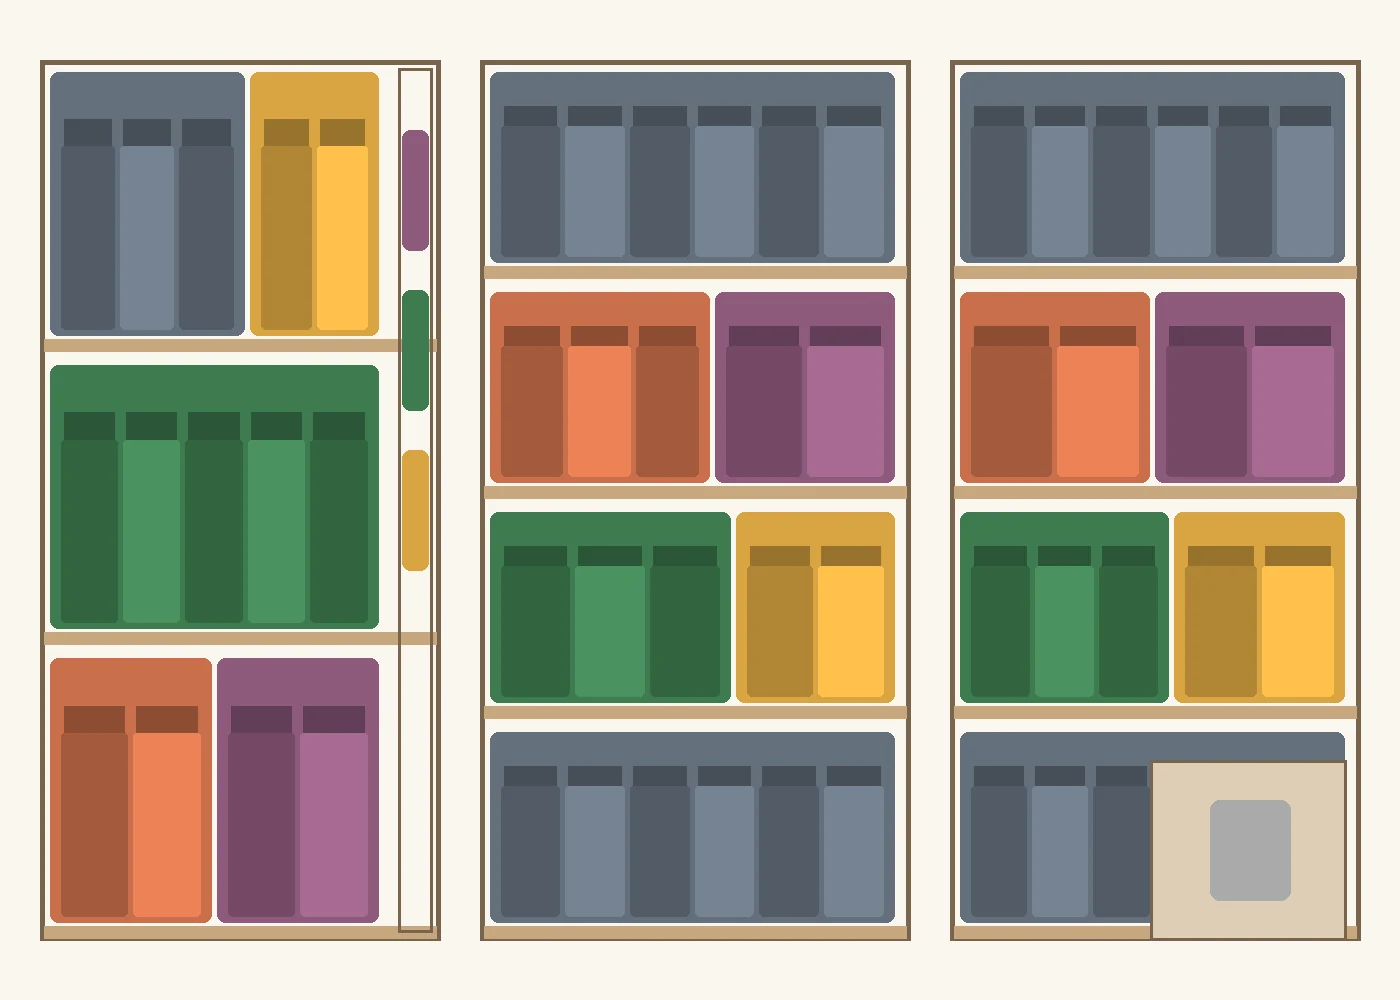
The zone map above shows the same five zones fitted to each pantry type. Each zone keeps the same color in every panel: green is Everyday Cooking, gold is Breakfast, terracotta is Baking, plum is Snacks, and slate is Backstock & Bulk — so you can read any panel at a glance once you know the colors. In the small-pantry panel, five zones compress onto a few shelves — zones share shelf lines, and the narrow strip on the right is the door rack carrying the overflow. In the closet panel, each shelf takes roughly one zone, with deep-shelf fixes doing the heavy lifting. In the walk-in panel, zones spread by wall and height, and a stretch of counter or lower shelving can hold small appliances and bulk. Print it or screenshot it, and use it as the reference when you assign your own shelves — the exact shelf each zone lands on will differ, but the height logic (everyday in the middle, heavy low, light high, backstock out of the way) stays the same everywhere.
The System by Pantry Type
The zones stay constant; the layout changes. Here is how the same system adapts to each pantry type — worked layouts, not generic tips.
Small pantry: one cabinet or a few shelves
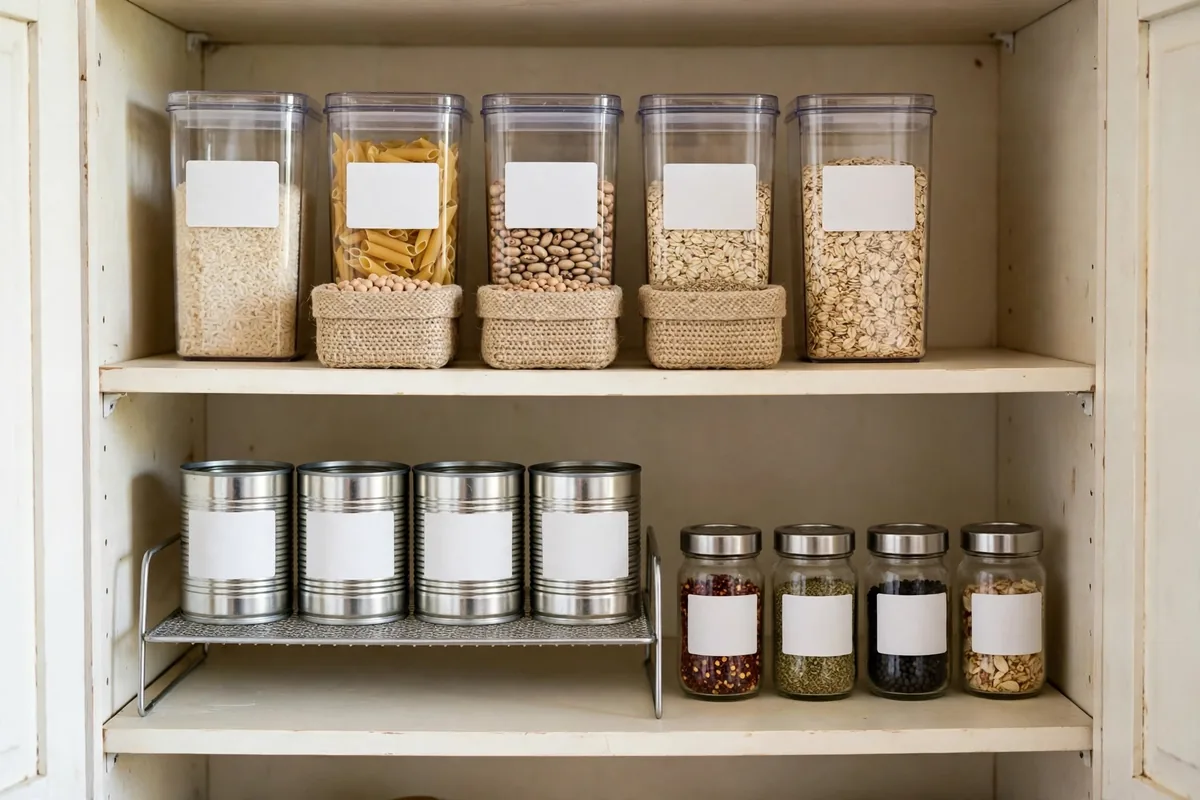
A small pantry might be a single deep cabinet, two or three shelves in a cupboard, or a narrow built-in. The system still works — the zones simply compress. One shelf can hold two half-zones side by side: breakfast on the left half of a shelf, snacks on the right, each in its own bin so the boundary is visible. Three rules matter most at this size:
- One row deep. On shallow small-pantry shelves, store one row of items deep wherever you can. The second row is where duplicates and expired food are born.
- Use the door. An over-the-door rack on a cabinet or pantry door adds a vertical strip of storage for spices, packets, and small jars — often the equivalent of an extra shelf.
- Go vertical. Shelf risers double the usable surface of a tall shelf gap, turning dead air above cans into a second tier for shorter items.
Assign the most reachable shelf to Zone 1, put backstock on the highest or lowest shelf, and let the door rack absorb the small, easy-to-lose items.
Closet or cabinet pantry: shelf by shelf
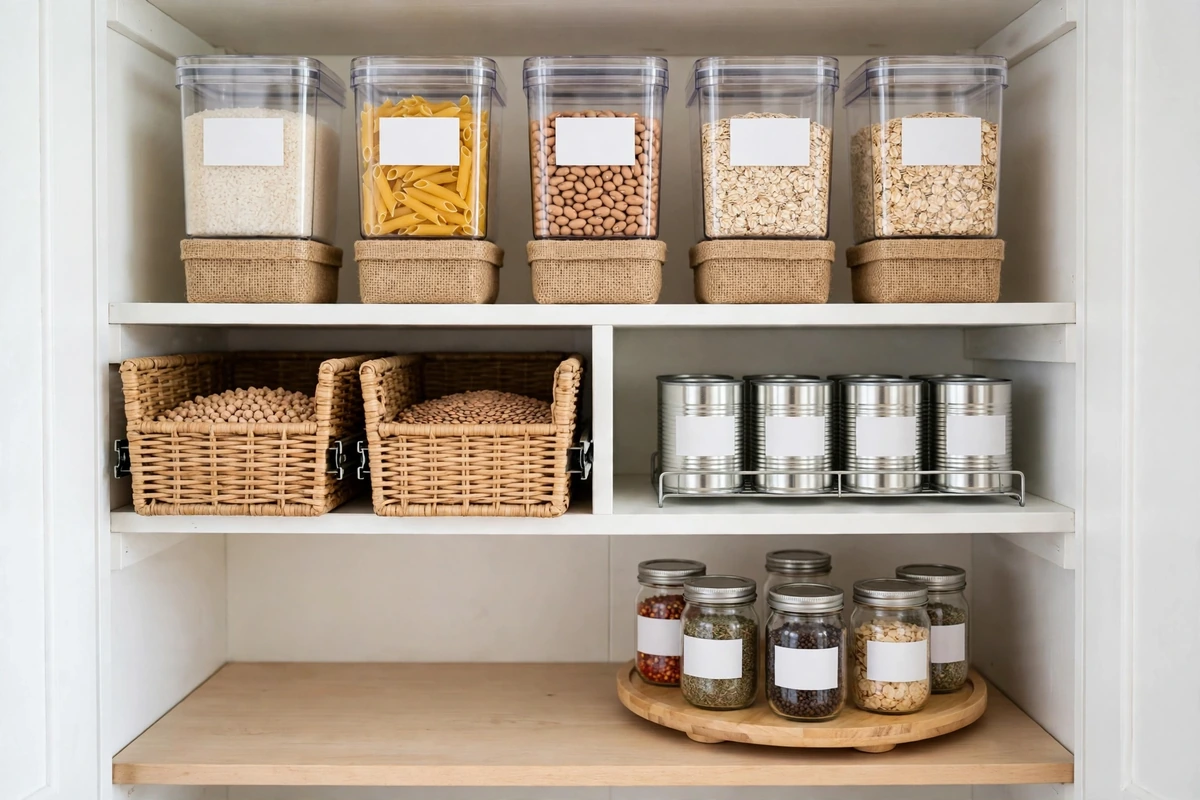
A closet pantry — or a run of kitchen cabinets doing a pantry’s job — is the most common setup, and the one where depth causes the most trouble. Work shelf by shelf from the middle out: the shelves at waist-to-eye level take Zones 1 and 2, the shelf above takes Zone 3 and light Zone 4 items, and the top shelf and floor level take Zone 5 backstock, heavy items low.
Deep shelves need a specific fix, because a 24-inch-deep shelf hides its back half. Pull-out bins turn depth into a drawer: group a category in a bin, and the whole category slides out for access. A turntable does the same job for oils, sauces, and jars in a deep corner. If you are planning the cabinet side of this — how many cabinets a kitchen typically has, and how tall pantry cabinets factor in — our guide to how many cabinets are in an average kitchen covers the counts, and if deep drawers are part of your setup, how many drawers a kitchen should have explains how drawer depth and placement are usually decided. Deep drawers, where they exist, are excellent pantry storage: they pull the back row to you by design.
Walk-in pantry: zones by wall and height
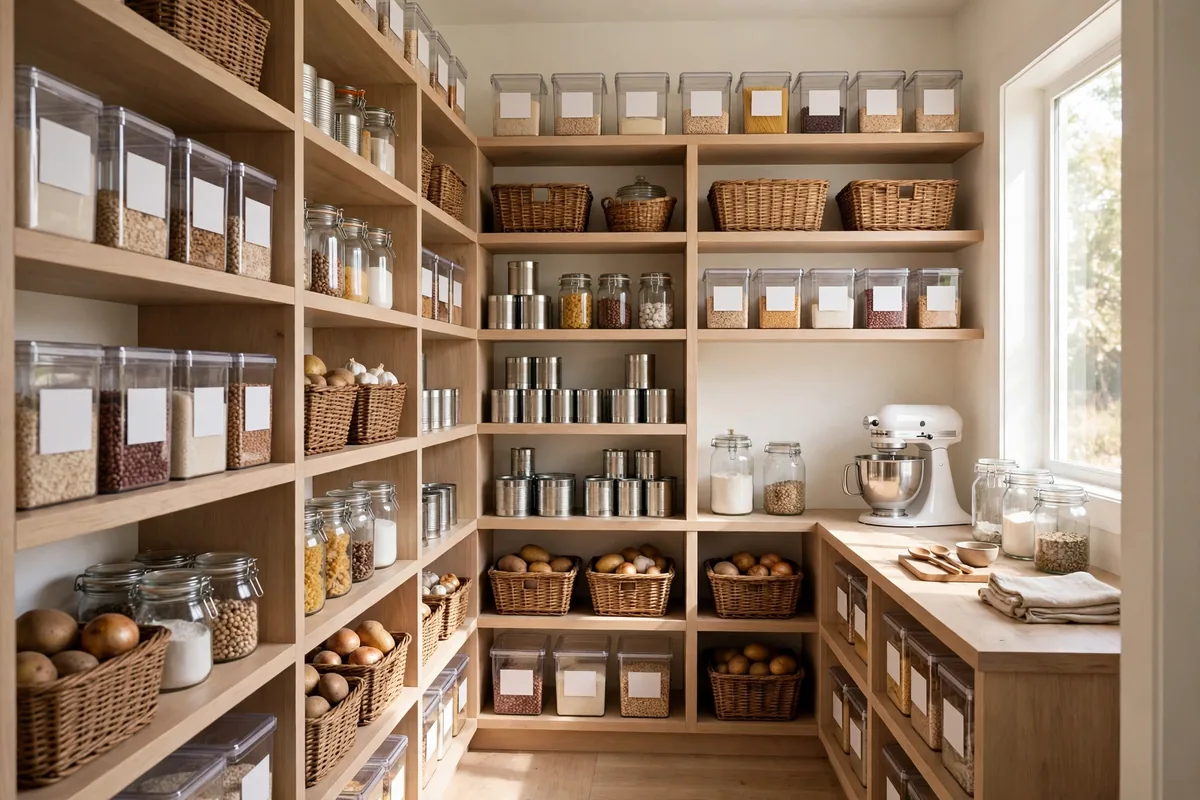
A walk-in gives the system room to breathe, and the layout question becomes shape. Most walk-ins are one of four: single-wall (shelving along one wall), L-shape (two walls), galley (two facing walls), or U-shape (three walls). In every shape, the same logic applies — daily zones on the wall you face as you enter, at waist-to-eye level; baking and snacks on the side walls; backstock and bulk on the highest shelves, the floor-level shelves, or the deepest wall.
Two walk-in specifics are worth planning for. First, shelf depth: shallow shelves — commonly recommended at around 12 to 16 inches — keep everything visible for the daily zones, while deeper shelving or pull-outs suit the bulk zone. Second, a counter zone: if the walk-in has or can fit a stretch of counter or low shelving, it is the natural home for small appliances (stand mixer, blender) that otherwise eat kitchen counter space, plus a landing spot for groceries during restock. Keep the aisle clear enough to turn around with a shopping bag in each hand; a walk-in that traps its owner gets used less, not more.
No pantry at all?
If there is no pantry — not even a closet — the short version is: claim one cabinet (or part of one) as the pantry cabinet, apply the same five zones at cabinet scale, and let the door rack and risers do the expansion work. That is genuinely enough to run the system. For the full picture — because a no-pantry kitchen usually needs its counters, walls, and sink area reorganized too — see our complete guide to organizing a small kitchen, which treats the pantry cabinet as one part of the whole-kitchen setup.
Containers, Bins and Labels: What Actually Earns Its Place
Containers are tools for specific jobs in this system, not the system itself. The test for any container is simple: does it make a category easier to see, reach, and rotate than the original packaging did?
Decant the staples you scoop
Flour, sugar, rice, oats, cereal, and dry pasta are the classic decanting candidates — items you scoop or pour from often, that slump and spill in bags, and that you need to assess at a glance (“how much rice is left?”). Clear, airtight containers answer all three: the level is visible, the seal keeps staples fresh, and square or rectangular shapes sit flush and waste less shelf than round ones. Decant a staple the day it comes home, and put a date on it (see labels, below) so rotation stays honest.
What NOT to decant
Decanting everything is a mistake the prettiest pantry photos encourage. Keep these in their original packaging:
- Items you use rarely — the occasional specialty flour or holiday baking ingredient does not need a permanent container; the bag, clipped, in the baking zone is fine.
- Items whose packaging carries instructions you need — if you rely on the cooking ratios or directions printed on the box, keep the box (or cut out the panel and tape it to the container).
- Small-quantity items — a few tablespoons of a spice or a single packet mix gains nothing from a jar.
- Anything that goes stale faster once opened and transferred — if it will sit for months, the sealed original package is the better storage.
The rule of thumb: decant what you scoop weekly; leave the rest packaged.
Bins and baskets by job
Bins earn their place by solving a named problem:
- Packets and pouches (sauce mixes, seasoning packets, drink sachets): a small open bin keeps them upright and visible instead of scattered.
- Snacks: one bounded bin or basket is Zone 4’s border.
- Cans: a shelf riser or stepped shelf keeps back-row cans visible; a bin works on deep shelves where cans can be pulled forward as a group.
- Deep shelves: pull-out bins, as covered above — the category becomes a drawer.
- Door storage: a rack rated for the weight of what it will hold, for spices and small jars.
Choose by job first and size second, measured against your shelf dimensions from the prep step. For specific tested picks across these jobs — clear pantry bins, woven baskets, tiered and stackable options — see our roundup of the best kitchen storage baskets, which covers the actual products; this guide sticks to the types and the jobs they do.
Labels that hold the system together
Labels are the maintenance crew of the whole system — they are how other household members, and future-you, know where things belong. Two rules make them work:
- Label by category, not by exact product. A container labeled “Rice” survives a switch from basmati to jasmine; one labeled with a specific brand does not. Category labels also make the zones legible at a glance.
- Add dates for rotation. A small date label — the month and year you decanted or opened the item — is what makes first-in, first-out (below) possible without guesswork. These are rotation dates, not a replacement for the printed dates on the original packaging: if a food’s printed date matters, copy it onto the container label as well when you decant.
Uniform labels across containers do double duty: they make the pantry readable, and they make gaps obvious, which is the visual cue that drives the restock list.
Pantry Organization on a Budget
A pantry reset does not need a shopping trip to work. The zones, the sort, and the placement rules cost nothing — they are decisions, not products. Spend money only where it solves a problem the free steps cannot.
Free first: what the reset alone fixes
Start with what you already own. Glass jars from jam and sauces, sturdy small boxes, and any baskets already in the house can serve as zone containers for the first pass. The empty-sort-measure step itself usually recovers a surprising amount of “lost” space — duplicates consolidate, expired items leave, and categories that were smeared across three shelves take up one. Live with the free version for a few weeks; the gaps that remain after real use are the only shopping list worth having, and it will be shorter and more accurate than any list written in advance.
Dollar-store buy vs. skip
Budget stores are genuinely useful for some organizer types and a false economy for others:
- Buy: simple bins and baskets (a bin has one job — hold a category together), shelf risers, label supplies, and small jars for dry items you use quickly.
- Skip: containers sold as “airtight” whose lids do not actually seal. Flour, sugar, and rice live or die by the seal — a cheap container that lets in air and moisture costs more in spoiled staples than a slightly better container costs at the till. This is the one place to spend a little more.
- Check before buying: over-the-door racks — confirm the rack is rated for the weight of full jars and bottles, and that your door closes with it fitted.
The affordable uniform-container path
The uniform clear-container look — the one all over social media, usually achieved with specialty-store sets — does not require specialty-store prices. The look comes from consistency, not branding: one container shape in two or three sizes, square rather than round, with the same label style throughout. Widely available store-brand and online ranges offer exactly that spec — clear, airtight, stackable, in graduated sizes — at a fraction of boutique prices. Buy by specification (seal type, shape, sizes that match your measured shelf depth) rather than by brand, and add pieces gradually as the budget allows; a half-uniform pantry in the meantime works exactly as well as a finished one, because the zones do not care what the containers cost.
Keep It Working: The Restock and Reset Routine
The reset is an afternoon. Staying organized is a routine — a short one, built into things you already do. This is the part most pantry guides skip, and it is the difference between a system and a before-photo.
FIFO: first in, first out
Every grocery shop, new stock goes behind the stock already there — the fresh bag of rice behind the open one, the new cans at the back of the row. First in, first out is the standard rotation practice from professional kitchens, and the date labels from the container section are what make it effortless: the oldest date is always at the front, so it gets used first and nothing silently expires at the back.
The backstock rule and the restock trigger
Zone 5 works on one rule: the backup lives directly behind the in-use item (or in one known backstock spot), so “do we have more?” is always answerable at a glance. Pair it with a short staples list — the ten or so items your household never wants to run out of — and a trigger: when the in-use item is opened and the backup moves forward, the item goes on the shopping list. Not when it runs out; when the backup is promoted. That one habit eliminates both emergency purchases and the five-jar mustard surplus.
The 10-minute weekly reset and the monthly zone check
Once a week — while the kettle boils or the oven preheats — give the pantry ten minutes: return strays to their zones, pull use-soon items to the front, glance at dates in the zone you used most, and note gaps for the shopping list. Monthly, pick one zone for a slightly deeper check: wipe the shelf, confirm the containers still match what the household actually buys, and adjust. Habits change; a zone that no longer fits your cooking should be resized, not endured. Ten minutes a week is the entire maintenance cost of the system — the zones do the rest, because everything has a home to be returned to.
FAQ
What is the best way to organize a pantry?
Give every category a fixed home and place the homes by how often you use them: everyday cooking staples at waist-to-eye level, heavy items low, light and rarely used items high, and backstock out of prime space. That zoning approach — empty and sort first, measure before buying, then assign zones — works at every pantry size because it is a system, not a set of products.
What are the 5 pantry zones?
Everyday Cooking (oils, pasta, rice, daily canned goods and spices), Breakfast (cereal, oats, coffee and tea, spreads), Baking (flours, sugars, leaveners, extracts), Snacks (one bounded bin or shelf), and Backstock and Bulk (unopened duplicates and bulk buys, stored high, low, or deep — never in prime space).
How should you group pantry items?
Group by category and by meal or task: the things used together live together. Cooking staples in one zone, breakfast items in another, baking together, snacks contained in one place. Within a zone, keep one category to one home so restocking and finding things never require a search.
How do I organize a small pantry on a budget?
Start free: empty, sort, and assign zones using jars, boxes, and baskets you already own. Compress the zones — one shelf can hold two half-zones in separate bins — store one row deep, use the door for spices and packets, and add shelf risers before buying anything else. When you do buy, spend on genuinely airtight containers for flour, sugar, and rice, and save on bins and risers, where cheap works fine.
What foods should you not decant?
Items you use rarely, items whose packaging carries cooking instructions you rely on, very small quantities, and anything that keeps better sealed in its original packaging for long storage. Decant the staples you scoop weekly; leave the rest in its packaging, in the right zone.
How deep should pantry shelves be?
For the daily zones, shallow shelves — commonly recommended at around 12 to 16 inches deep — keep everything visible in one or two rows. Deeper shelves suit backstock and bulk, ideally with pull-out bins so the back of the shelf stays reachable. If your shelves are already deep, the pull-out bin and one-row-deep rules in this guide are the practical fix.
How do I keep my pantry organized after the reset?
Three small habits: rotate stock first-in, first-out every shop; promote the backup and add the item to the shopping list at the same moment; and spend ten minutes a week returning strays to their zones and pulling use-soon items forward. A monthly check of one zone keeps the system matched to what your household actually buys.
Quick-Start Checklist
The whole system on one screen:
- Sort — empty the pantry; keep, use-soon, discard-or-donate.
- Measure — shelf width, depth, and clearance, written down before any purchase.
- Zone — assign the five zones by frequency: everyday in the middle, heavy low, light high, backstock out of the way.
- Contain — decant the staples you scoop; bin the categories that scatter; leave the rest in its packaging.
- Label — by category, with dates for rotation.
- Rotate — first in, first out; backup behind the in-use item; restock when the backup moves forward.
- Reset — ten minutes weekly, one zone checked monthly.
Do those seven things and the pantry you have — small, closet, or walk-in — runs on a system instead of on memory. That, more than any container, is what keeps it organized.

Hello! I’m trying to explore more and provide my readers with more. Besides being a writer, I’ve also worked as an Editor and Proofreader.